Two of the most common questions that Johanne gets asked is 'What is the most important part of a design project' and 'Where should I start?"
The answers to both are those will depend on the individual project, space and preferences of the person who is going to live in that space - so no project will ever look the same. Some people love simple fabrics, furnishings and lighting, others like a modern minimalist look, while others will crave color, patterns and detail.
The good news is that no matter what makes your home, home, there is a simple - yet powerful - 5 step process that we use every day here at Project Guru Designs. So grab a coffee, pen and a paper, and take the first steps to creating space for your best life!
Step One: Designing the Room Layout
The first step in any successful design process is the project layout. There are some existing theories about what generally works best, but in reality, the unique needs of the client is the most important.
The photographs below show the widely differing needs of the previous and current homeowners. The existing kitchen has a very small working footprint, clearly focusing on keeping the elements of the 'work triangle - refrigerator, sink and cooking area - as close as possible.
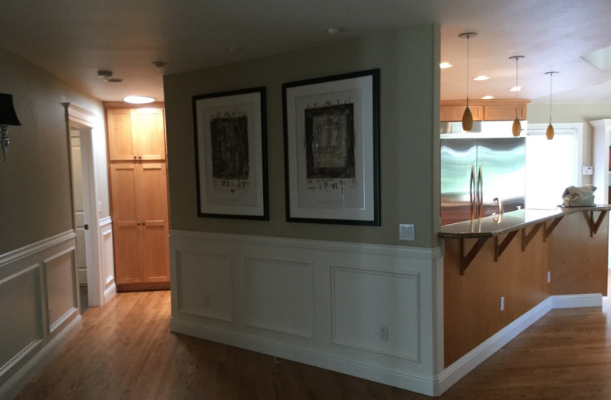
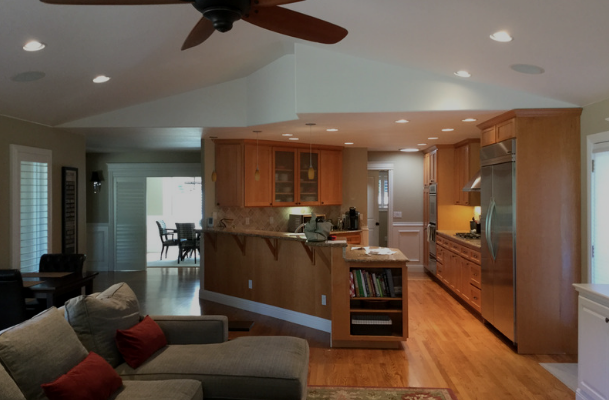
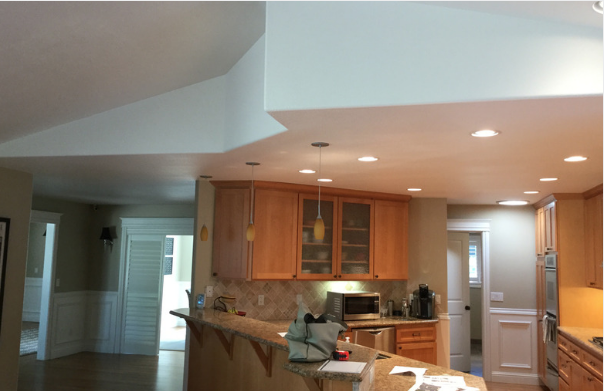
The home had a dark, outdated kitchen that was inconsistent with the style of the rest of the home. The kitchen lacked a large pantry which was a priority for the client. A large dividing wall blocked natural light and line of vision into the main kitchen and family room, and impeded traffic flow. Despite a large footprint, a closed in feeling pervaded the space. The elevated diagonal breakfast bar added unnecessary separation, and added to the work space congestion and its boxed-in feeling.
The current owners had very different needs, and brought Johanne in to make their kitchen reflect their lifestyle. The layout design brief included:
- Create a layout that allowed more natural light and echoed the clean, uncluttered flow of the rest of the home.
- Incorporate a wider, more coherent traffic flow through the main spaces, transitioning through the dining area, the kitchen and the family room easily.
- Include a kitchen island for multi-person food preparation and informal entertaining.
- Include a dedicated coffee bar area with sink, away from main food preparation area.
EXISTING FOOTPRINT
Images Above:
On the left, the previous layout obstructed the traffic flow and despite having more floor space, had less useable workspace. Most countertop is in an awkward corner with no line of vision or natural light.
The new layout on the right makes much more efficient use of space, features expansive counter space and open traffic flow and line of vision.
BEFORE: VIEW FROM ENTRY HALL
BEFORE: VIEW FROM FAMILY ROOM
BEFORE: DROPPED CEILING WITH INADEQUATE LIGHTING AND NUMEROUS BLACK SPOTS
BEFORE: CRAMPED, AWKWARD KITCHEN LAYOUT WITH INSUFFICIENT SPACE FOR ENTERTAINING
Once Johanne had carried out an in depth design consultation with the clients and taken detailed measurements, she was able to create her initial design concept. However, most people struggle to visualize their new space from a 2D plan, which is why Johanne uses 2020 3D rendering to invite clients into their new space at every stage of the design process.
PROPOSED LAYOUT
With a project as large as this, it was also important that the clients could virtually 'walk through' potential options prior to work commencing. Project Guru Designs used a comprehensive design process and powerful 3D design tools to make sure that their project design reflects exactly what they needed.
To see the technology in action, click on the video below.
In the next post, we'll be exploring step two of the design process - lighting!
Here at Project Guru design, we combine passion for functional spaces centered on the individual needs of each client. We take the time to understand the client's unique style and present them with custom options that will look great and work beautifully from day one and for years to come. Our 3D design service takes you through from the initial steps of walk through, taking critical measurements and creating a design concept to planning the project timeline, selecting finishes, sourcing skilled tradespeople and managing the project from dust to delivery.


